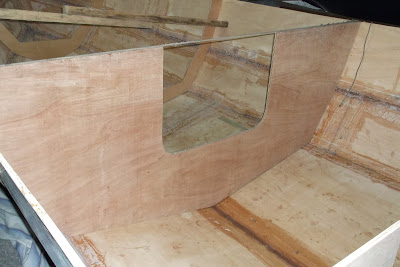
Today we've adjusted the bulkheads sizes using our small block planes. We've thus placed them on the boat and planed them where required until they fitted well.
Building a small motor boat at home in our yard. Boat built for family use and weekend relaxing ;)
Friday, 16 August 2013
Thursday, 15 August 2013
Gluing the panels inside
Friday, 9 August 2013
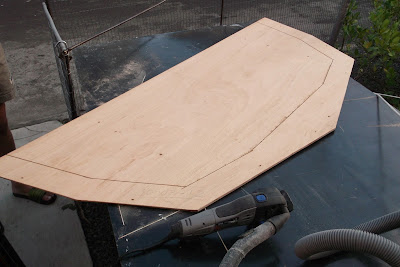
Cutting out Bulkhead with Dremel
Today a small work with a huge importance was done. We cut out the Bulkheads' shape for the passageways inside of the boat.
Wednesday, 7 August 2013
Building a ladder to get into the boat and sanding the inside
(Written : Sultan)
First day of work for dad without me as I have now resumed studies at University.
First day of work for dad without me as I have now resumed studies at University.
He built himself a big ladder from our jig-wood. The ladder will allow anyone to get into the boat to work inside of it without having to climb onto the thin edges where the fiberglass can easily hurt anyone until it is sanded smooth.
Only one way to quickly and efficiently polish a piece of dry epoxy glue. We use a small drill and a circular sand-paper adapter on it. It is in fact so efficient that in numerous cases we have had to add glue again onto the sanded area because excess fiberglass and glue had been removed.
Only one way to quickly and efficiently polish a piece of dry epoxy glue. We use a small drill and a circular sand-paper adapter on it. It is in fact so efficient that in numerous cases we have had to add glue again onto the sanded area because excess fiberglass and glue had been removed.
 |
| Dad and his new ladder |
 |
| inside of boat sanded |
 |
| Add caption |
 |
| Edges now smooth |
 |
| Sides very smooth |
Sunday, 4 August 2013
Building a table-saw and photos of boat now upright
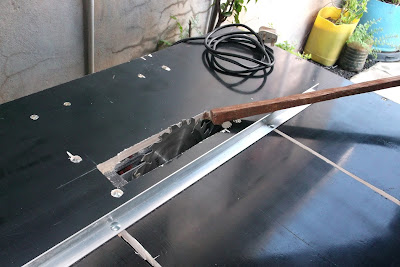
For the outer edges of Serenite's hull we're going to place long strips of wood called "gunwales". Thus, we will have to cut them to the proper dimensions and, for that, we built ourselves a table-saw from a sheet of marine plywood and our dangerous Circular Saw that we almost never use because of the risks involved.
We've even tested it with a big piece of wood and cut a thin strip from it.
Then we removed the cover of the boat and took some pictures of it upright.
We've even tested it with a big piece of wood and cut a thin strip from it.
 |
| The table built in about 5 minutes with our cordless electric screw drivers. |
 |
| just added the circular saw to the table. |
 |
| The Blade |
 |
| Circular saw firmly fixed |
 |
| the exit for wood dust can later be used to collect wood flour |
 |
| extra support for the engine |
 |
| our big log and its thin strip |
Then we removed the cover of the boat and took some pictures of it upright.
 |
| Serenite Upright |
 |
| looking wide and spacious |
 |
| untreated inside part of the nose |
 |
| already looking ready for the sea |
 |
| the "bearded" captain |
 |
| protection against sunlight |
 |
| completely covered up |
Saturday, 3 August 2013
Turning Boat upright
With help from my neighbour and his sons, we quickly turned the boat over onto its hull. Now its looking beautiful upright. Pictures will be coming along by tomorrow night.
Friday, 2 August 2013
First bath of Serenite and more sanding
Today in the early morning, Serenite got her first bath. Since we have now finished with placing the fiberglass, the boat is entirely plastic-like on the outside and can be washed with a water hose.
In the afternoon, we sanded her again to remove any kind of roughness off her skin and then applied a last layer of epoxy glue leaving her with a shiny and smooth finish.
Now we're planning to turn her upright again during the weekend and then start with her interior during next week.
In the afternoon, we sanded her again to remove any kind of roughness off her skin and then applied a last layer of epoxy glue leaving her with a shiny and smooth finish.
Now we're planning to turn her upright again during the weekend and then start with her interior during next week.
Thursday, 1 August 2013
Epoxy boat building : If you're not sanding, you're not doing it right!
Today........we sanded.....and sanded the boat again.
We actually started the day by going to Amro Chemicals again to buy a new stock of epoxy and hardener. On reaching home, we sanded the outer hull again as we wanted to add one last of glue to make it smooth so that marine life won't be able to hold on to it. Before sanding, the hull was shiny but had some rather jagged edges where layers of fabric met. Now it is all smooth and waiting for our last layer of glue. We will put it early tomorrow morning.
We actually started the day by going to Amro Chemicals again to buy a new stock of epoxy and hardener. On reaching home, we sanded the outer hull again as we wanted to add one last of glue to make it smooth so that marine life won't be able to hold on to it. Before sanding, the hull was shiny but had some rather jagged edges where layers of fabric met. Now it is all smooth and waiting for our last layer of glue. We will put it early tomorrow morning.
 |
| Only half sanding done in this picture. |
Subscribe to:
Comments (Atom)


